
 by Adam Johnson
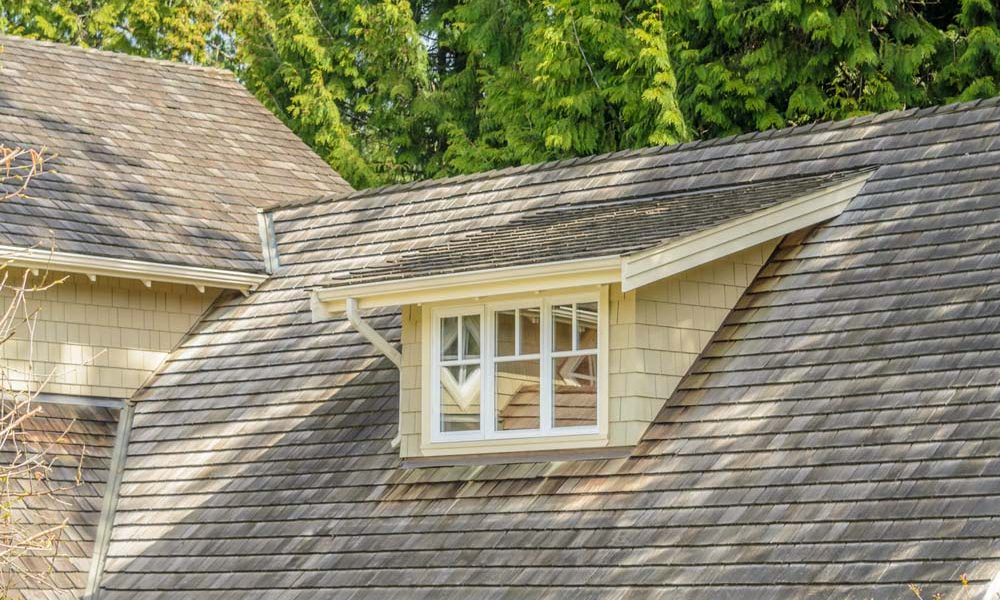
Valleys do the hardest work on any roof. They collect water from two slopes at once and carry it to the gutters, so when a cedar shake or shingle valley is damaged by hail, wind, or age, the repair has to be done right. On cedar valley repairs, though, what the industry standard requires and what insurance companies are willing to pay for are often far apart. At Johnson Restoration Services, an experienced Omaha roofing and restoration contractor specializing in cedar shake roof repair in Nebraska, we see the same pattern on claim after claim: the carrier’s estimate pays for a narrow, two-foot strip along each side of the valley, while the manufacturer’s industry standard calls for a much larger, wedge-shaped repair area. This article explains why the wedge method is required, how insurance scopes usually get it wrong, and what homeowners, commercial owners, and contractors can do about it.
The Standard: The CSSB Valley Repair Technical Bulletin
The Cedar Shake & Shingle Bureau (CSSB) is the recognized authority on cedar roofing and has published installation standards since 1915. In May 2024, the CSSB released a technical bulletin titled Valley Repair Cedar Shakes, with a companion bulletin for cedar shingles. Unlike the CSSB’s New Roof Construction Manual, which covers new installations, these bulletins deal specifically with repairing an existing valley, which is exactly the situation in most insurance claims.
The bulletin lays out a specific procedure:
- Replace the underlayment with the valley metal. “When valley metal is replaced, the underlayment needs to be replaced and should be at least 4 feet wide, extending out 2 feet from the center line of the valley for the entire length of the valley.”
- Remove shakes at least 2 feet from the valley at the eave. The bulletin then adds: “The longer the valley the wider the removal area.”
- Strike a line perpendicular to the eave. Starting at the 2-foot marks at the eave, a line is struck perpendicular to the eave “and continuing to the ridge.” The bulletin notes that the line “may need to taper out a little for proper nailing.”
- Carefully preserve felt for the tie-in. Working from that line toward the valley, the first 2 feet of shakes are removed without damaging the interlay felt, leaving 2 feet of the original felt to tie into.
- Weave the new felt into the old. New interlay felt must extend at least 2 feet on each side of the valley centerline and tie into the existing felt by “alternating one new row of felt on top and the next new row of felt under the original felt,” so that “no two adjacent interlay felt laps are lined up.” Laps should be 2 feet “as there will be some nail holes in the original felt.”
- Install new valley metal, felt, and shakes per the New Roof Construction Manual. The bulletin’s valley metal detail calls for 8-foot sections overlapped 6 inches at the joints and painted on both sides, an open valley width of 4 to 8 inches depending on water volume, metal extending as far as the shakes, and eave felt lapped over the valley joint for three levels of eave protection.
Why the Repair Area Is a Wedge, Not a Strip
The key instruction is the line struck perpendicular to the eave. A valley does not run straight up the roof. It runs diagonally from the inside corner at the eave up to the ridge. A line struck straight up the slope from a point 2 feet off the valley at the eave therefore moves farther and farther away from the valley as it climbs. The result is a removal area that is 2 feet wide at the eave and much wider at the ridge: a wedge.
This is not arbitrary. It follows directly from how cedar roofs are built:
- Courses must end on a straight, vertical line. Shakes are laid in horizontal courses with offset joints. Ending each course on a line that runs up the slope lets the new shakes be woven back into the existing courses with proper side laps, joint offsets, and nailing. A cut line that runs parallel to the diagonal valley leaves a stair-stepped edge of short, partial pieces that cannot be fastened or lapped correctly.
- Interlay felt has to be woven, not patched. Shake roofs depend on interlay felt shingled between every course. The CSSB requires alternating new felt over and under the old, with 2-foot laps that never line up from one course to the next. That is only possible when there is a continuous working edge with 2 feet of undamaged original felt exposed along every course. A narrow diagonal strip does not provide this.
- Longer valleys move more water. The CSSB states plainly that “the longer the valley the wider the removal area.” Long valleys collect more runoff and need the full metal, underlayment, and eave-protection system to perform. The wedge grows with the valley by design.
- Avoiding damage to the original roof. The bulletin warns installers not to fold felt back over the shakes because it “could crack the felt.” Squeezing a valley repair into a 2-foot strip forces exactly the kind of prying, folding, and blind nailing that damages the surrounding roof.
How Insurance Scopes Get It Wrong: The “Strip Method”
Most carrier-side estimates in Nebraska are written in Xactimate, and on cedar valley claims we see the same approach again and again. The adjuster pulls the valley’s linear footage from a sketch or aerial measurement report, then scopes shake removal and replacement as a strip: valley length × 4 feet (2 feet on either side). An 18-foot valley becomes 72 square feet of shakes, or 0.72 squares. Valley metal is added by the linear foot, and the line items often end there. We call this the strip method.
The strip method often comes from misreading the CSSB bulletin itself. The bulletin does say the underlayment should extend “2 feet from the center line of the valley for the entire length of the valley.” That is the minimum width for the underlayment. It is not the shake removal area. The shake requirement is a minimum of 2 feet at the eave, widening along a line struck perpendicular to the eave all the way to the ridge.
The gap is larger than most people expect. Using the example in the figure above (a 6/12 roof with a 12-foot horizontal run and an equal-pitch valley about 18 feet long):
- Strip method: 18 LF × 4 ft = 72 SF, or about 0.72 squares.
- CSSB wedge method: roughly 107 SF per side, or about 2.15 squares total.
That is about three times as much shake removal and replacement, before counting the taper for proper nailing. For contractors and adjusters who want to check the math, the wedge area on each side is approximately L × (2 + R ÷ 2), where L is the slope length from eave to ridge and R is the horizontal distance the valley travels along the eave line from its low point to the ridge. On an equal-pitch valley, R equals the plane’s horizontal run.
Strip-method estimates also tend to leave out parts of the CSSB procedure entirely, such as:
- Interlay felt for the full repair area, including the woven tie-in at 2-foot laps
- Full-length valley underlayment at least 4 feet wide
- Eave felt lapped over the valley joint for three levels of eave protection
- Valley metal that meets the bulletin’s detail (8-foot sections, 6-inch laps, painted both sides, extending as far as the shakes)
- Labor for the careful hand removal needed to save the original felt for tie-in, and the waste generated by cutting valley pieces
The result is an estimate that cannot pay for a repair done to the industry standard. The owner is left with a gap, or with a contractor who cuts corners to fit the number.
Why This Matters to Building Owners
A valley patched to fit a strip-method budget can look acceptable from the ground, but it usually fails where you can’t see it: mismatched felt laps, laps that line up, poorly fastened partial shakes, and a seam running diagonally through the most water-heavy part of the roof. Those leaks often show up months or years later, when the carrier may point to “faulty workmanship” and the original claim is long closed. Doing the repair to the CSSB standard the first time protects the roof, the interior, and the owner’s ability to rely on future coverage.
The scope of the repair also affects the larger repair-or-replace decision. In its adjusters’ guide to hail damage, the CSSB advises that replacement of a roof or roof segment should be considered “when repairs will cost 80% or more of the replacement cost,” and tells adjusters to “factor in any relevant replacement product costs of hip and ridge, valleys,” and other complicated work. When valley repairs are priced at the true wedge quantity, and especially on roofs with multiple or long valleys, a slope that looked “repairable” on a strip-method estimate may cross that threshold.
For Contractors and Adjusters: Building a Supportable Valley Scope
- Cite the bulletin directly. Attach the CSSB Valley Repair Cedar Shakes bulletin (or the shingle version) to the supplement and point to the perpendicular line requirement and “the longer the valley the wider the removal area.”
- Separate underlayment from shakes. If the adjuster cites “2 feet from the center line,” point out that the language applies to underlayment, not the shake removal area.
- Diagram and measure the wedge. Mark the 2-foot points at the eave and the perpendicular lines to the ridge on the roof sketch, and calculate the area of each side. Photos with chalk lines on the roof are especially persuasive.
- Itemize the full system. Include interlay felt, valley underlayment, eave protection, compliant valley metal, tie-in labor, and waste, not just shakes and metal.
- Run the repair-versus-replace math. Once valleys are priced correctly, compare the repair cost to slope replacement using the CSSB’s 80% guidance.
- Check local code. The CSSB notes its bulletins are “not intended to supersede local building codes.” Most Nebraska jurisdictions have adopted a version of the International Residential Code, which requires roof coverings to be applied according to the code and the manufacturer’s installation instructions and has specific provisions for wood shakes (Section R905.8). Confirm requirements with your local building official.
For Homeowners: What to Look For in Your Estimate
- Find the shake or shingle removal quantity near each valley. If it equals the valley’s linear footage times 4, the estimate was likely written with the strip method.
- Check whether interlay felt, valley underlayment, and eave protection appear as line items at all.
- Don’t sign off on a valley repair until your contractor confirms the scope can be completed to the CSSB standard.
- Get help from an experienced cedar contractor before accepting a final settlement.
Let Johnson Restoration Services Get Your Cedar Valley Repaired the Right Way
At Johnson Restoration Services, we handle cedar shake and shingle roofs from both sides of the claim. If your insurance estimate pays for a 2-foot strip and your roof needs a CSSB-compliant wedge repair, we can manage the claim for you: measuring and diagramming the correct repair area, documenting it with photos, and building a supplement backed by the Cedar Shake & Shingle Bureau’s own standards. Once the scope is approved, our crews can complete the repair to that standard. Whether you are a homeowner, a commercial property owner, or a contractor or adjuster who wants a second set of eyes on a cedar valley scope, call us at 402-718-8034 or schedule a consultation today.
This article is for general informational purposes only. Every roof and every policy is different. Refer to the current CSSB publications and your local building code for requirements that apply to your project.

Adam Johnson
Adam Johnson is an attorney licensed in Nebraska and is the founding member and current President of Johnson Restoration Services - a regional claim management and storm restoration contractor in Omaha. Mr. Johnson is a second generation Omaha native and is proud to serve its community with honest and ethical legal and restoration services.
Related Articles
Understanding Nebraska’s Matching Regulation: What It Means for Property Owners After a Loss
When a storm rips through Omaha, leaving hail-damaged roofs or busted siding in its wake, property owners—whether homeowners or business...
Read More
Navigating the Insurance Maze: How Johnson Restoration Simplifies Your Claim Process
When a hailstorm, windstorm, or fire damages your Omaha, Nebraska, home or business, filing an insurance claim can feel like...
Read More
Policy Language vs. Laws and Regulations: What Wins?
In the realm of property insurance claims for storm-damaged siding, ensuring that insurers cover the replacement of all necessary sections—including...
Read More